Saturday 24 February 2018

Automobile leather


Correct information regarding the care of leather is scarce, often contradictory, misleading, or simply wrong. Misinformation can lead to inadvertent damage to your vehicles leather upholstery; my goal is to present clear, concise, accurate information. 

There is a great deal of conflicting information on leather care being put out by leather experts themselves who recommend the same products and techniques be used regardless of the grade or the finish applied or use baffling pseudo scientific techno speak as another marketing ploy.

All of which makes it difficult to find a definitive, unbiased answer. Using the correct product is important in order to protect your car’s interior. If you keep your cars’ interior clean, you can easily save your car for a good couple of years and it can stay in a ‘like-new’ condition, and maintain a better resale value. Cleanliness is one of the major things buyers look for when purchasing a vehicle.
Modern vehicle upholstery is either Fabric, finished leather or Viynl, fabric and vinyl are self-explanatory, however, finished leather is not so I offer this explanation

Be cognizant that the leather and finishes used for automotive upholstery vary from leather industry standard descriptions and although the names are similar the type of leather, pigmentation and finish are often very different. Si it is very important to be able to recognise the various finishes and materials used by OEM’s as they all require different methodologies and products for proper care and maintenance

Finished or Coated Leather - the surface coating applied to the leather substrate does not exceed one-third of the total thickness of the product but is in excess of 150 ยต (microns).
Nappa Leather –is the tanned skin of a sheep and generally denoted as high quality, soft, full grain leather, like Aniline this grade of leather would not stand the rigorous use of an automobile interior.
Unfinished Leather - is left in its natural state without the application of a clear coat, unfinished leather is very rarely found in modern automobiles and must be maintained on a regular basis with products utilizing natural oils
Leather Dye- the application of a Pigment (colour) either by hand rubbing or immersion
Pigmented - leather that has been applied to a surface colour, usually by spraying and is analogous to the "staining" of wood


So be cognizant that you are dealing with the finished coating of the leather  NOT the  hide itself

The ideal product would be a urethane cleaner that provides anti-abrasion, whilst allowing some surface lubrication to allow easy exit and egress  Remove surface dirt and dust, cleaning the seams periodically is important as dirt/grit will abrade the stitching causing them to fail, prise them apart, then use a soft brush, vacuum and then use a  cleaner, one section at a time, and then finally wipe off with a clean, damp 100% cotton micro fibre towel

You should use a product specifically formulated to treat the finish coating, one that contains special cleaners that remove oxidation, grime, body oils and perspiration salt while maintaining the flexibility of the finish so that it remains supple, not dry and brittle (Leather Master™ Foam Cleaner or Iz Einszett Plastic Deep Cleaner) 

Proper surface care
Is all about knowing the properties of the surface you want to treat and what product contains the correct formulation of ingredients best suited for that surface. Leather finishes are a very chemically complex material, and if the product is incompatible with it in any way, it can exert a damaging effect: finish peeling, finish cracking, color transfer ("crocking"), yellowing, and general degradation are some of the problems that can be caused by the application of an improperly formulated, incompatible leather treatment product.

You should use a product specifically formulated to treat the finish coating, one that contains special cleaners that remove oxidation, grime, body oils and perspiration salt while maintaining the flexibility of the finish so that it remains supple, not dry and brittle (Leather Master™ Foam Cleaner or Iz Einszett Plastic Deep Cleaner)


Friday 9 February 2018

Bilt-Hamber Auto-Foam


Once a vehicle has accumulated a significant amount of film traffic dirt and road grime and you run the risk of inflicting sub-surface paint scratches during the wash process. This is due to the greater number of contaminants present that may inadvertently be moved around as they are removed, and the tendency to use more friction on paint surface to get it clean.

You can mitigate these risks by rinsing off as surface much dirt and grime as possible using a hose or a pressure washer before washing the bodywork by hand. Ten to fifteen minutes spent carefully rinsing off in this way is time well spent, the use of a pre-wash foaming solution can help tremendously.

The idea behind applying thick clinging foam to your car before washing is simple and the benefits are obvious. If you apply a generous coating of suds to a dirty surface and allow it to cling in situ for many minutes at a time, the surfactant cleaning agents have longer to work and therefore dissolve and suspend a lot more dirt and grime. By the time the foam is eventually rinsed off much of the dirt and grime is simply washed away, leaving relatively clean surfaces behind ready for a careful wash using a car wash concentrate solution.

The major benefit is that the bulk of dirt removal is done before a wash mitt is placed on the paint surface, which greatly reduces the risk of inflicting marring and fine scratches during the hand-washing process.

Bilt Hamber Auto Wash is a low suds formula and is quite different to most other pre-wash shampoos. It’s a premium quality, low suds formula pre-wash treatment, designed to soak and saturate soiled vehicle paintwork prior to the application of vehicle shampoo. Auto-Foam is gentle and can be used in conjunction with all pressure washer foam lances (I prefer a pump sprayer as opposed to a lance) 

A highly concentrated pH 13.0  pre-wash foaming agent, produces a high foam content which both breaks the bond between the dirt particles and your vehicle’s paintwork and lubricates particles thereby enabling the safest possible removal of traffic film. highly concentrated pH 13.0  pre-wash foaming agent, however once diluted to the correct ratio it will drop to 8-10pH. It produces a high foam content which both breaks the bond between the dirt particles and your vehicle’s paintwork and lubricates particles thereby enabling the safest possible removal of traffic film.

It contains surfactants that will lift dirt, allowing it to be dissolved and carried away, whilst remaining completely touchless. It contains a powerful wetting agent that causes the bubbles in the foam to systematically burst as they move over the paint surface, enabling the surfactants to progressively soak and suspend the accumulated dirt and grime. This formula effectively lifts dirt and grime, making it easy to flush/rinse away

Use on cool surfaces. Dilute product  1:100  for light cleaning (4ml of product with 96ml of water for a total 100ml) and up to 5 parts in one hundred for heavily soiled vehicles. It is important to know the flow rate of your equipment to determine the correct add rate. If in doubt measure the nozzle output and chemical feed rate.

Foam production relies on air being drawn into a foaming solution as it passes through an injector head into the mainstream of water running through either a foam gun or a foam lance. The higher the pressure of the water, the thicker the resulting foam will be.


Application:  
Bilt Hamber auto-foam is a suitable pre-wash solution for use in any foam gun or foam lance system, as long as a final dilution ratio of approximately 50:1 can be achieved. With regard to the systems the following advice applies: 

(a) for use with a Foam Gun, remove the foam gun body and pour or pump approximately 400 ml of Bilt Hamber auto-foam into the bottle, then fill the bottle to the top with hot water, refit the foam gun body and shake the whole unit gently to mix the solution before finally attaching it to your hose - then squeeze the trigger and adjust the top dial on the foam gun body until you get the desired foam thickness;

(b) for use with a Foam Lance/ Pressure washer -, remove the foam lance body and pour approximately 200 ml of Bilt Hamber auto-foam into the bottle, then fill the bottle to the top with hot water, refit the foam lance body and shake the whole unit gently to mix the solution before finally attaching it to your pressure washer - then fire the washer up, and adjust the top dial on the foam lance body until you get the desired foam thickness.

In both examples given above, you can safely double the amount of Bilt Hamber auto-foam used when tackling particularly dirty cars, or else halve it if only a light clean is needed.
Allow the foam to dwell on the paint for about 5 mins. Then thoroughly wash off all the dirt and grime. 

Dilution: 4ml to 96ml (IL) The typical inlet water pressure to a home is about 40 to 45 psi. (3 bar)

Snow Foam
Foam is an aerated chemical mixture that you spray on using a pressure washer, the snow foam mixture itself is a pre-cleaning foam, it sits on your car paintwork and helps to dissolve and lift dirt and grime that is there. If you leave it to do its thing, it makes it easier to wash off the dirt by hand or with the pressure washer, removing all dirt and stains. The mixture you use for your snow foamer will depend on what you buy, however, to use it you will need a snow foam gun which will connect to your pressure washer.

Before beginning it is better to have dry panels, this stops the foaming from sliding off, so if it has rained or you have already washed down the car it may be better to leave it to dry before foaming

Consistency
A common problem is getting the right consistency when foaming. If it is too diluted (too much water), it will just slide off the car, therefore it won’t set and help to dissolve any dirt making it a pointless exercise.

With different formulas used by different snow foaming brands,  it isn’t possible to advise on the correct formula to use. Depending on the soap foam brand you buy, ensure to read and follow the specific instructions closely to make sure the foam applies the way it should.

Depending on the instructions for the snow foam you use for the current amount into the bottle and then top up with water and screw onto the snow cannon container.  On the container there is will be a small knob which you can turn, this will adjust the amount of foam you get when using the spray gun. If you move the knob towards the (+) you will get more water, and if you move towards the (-) you get less water. When you have less water you will have more foam so you get a stronger mix applied to the car surface. Feel free to experiment with different mixtures until you get a foam consistency that you are happy with.

To get a thick foam you want to use less water, so you do not have to fill the containers completely when mixing. When the bottles are filled completely, you tend to get runnier foam. Personal preferences will, therefore, dictate how much water you choose to use.

You may find topping up the bottle as you go along helps with the consistency of the foam, this may not be needed however if you have a large vehicle and applying a thick layer of foam then it may become thinner as you go on, so topping up will keep a consistent layer.

Start Foaming
You should use sweeping, unhurried motions moving either up and down or side to side. This will ensure your car gets full and even coverage. If you have an adjustable lance, using the wide spray means you need fewer passes to cover the car. Be careful using the jet spray setting because this can actually remove foam you already had set in place.

Follow up with a suitable post foam wash.
My process differs from most in that instead of using a drying towel for my final wipe, I use a clean Microfibre towel cloth, lightly dampened with ONR from the pre-spray bottle. (About 6 sprays per side) Should there be any dirt remaining, you are at least tackling it in the safest possible way.

The biggest risk of creating swirls is at the drying stage, especially using a dry microfibre towel. Using ONR as a drying aid is definitely the safest way to approach this task. The dampened Microfibre towel / ONR working together bring out the best qualities of each technology. 


Copyright © 2010 - 2016 TOGWT® (Established 1980) all rights reserve

Removal of Road Paint (Traffic Lane Paint)

Road paint

Is a pigmented resin system, very high in solids with a colour aggregate and is more like an adhesive than paint; it contains silica (glass) microbeads that help reflect light, however, they can cause scratches if you use mechanical removal.

Correction / Removal –
(a) Use 3M Adhesive Remover and detailer’s clay or a plastic razor blade.
 (b) 3M Eraser Wheel Detailer’s Clay
(c) Wet-sand with 2000 - 2500 grit finishing paper and a Unigrit block.

For heavy accumulations or paint that has dried for several days on the vehicles paint surface, apply a liberal coating of Vaseline to the dried traffic paint and allow the product to remain overnight and then pressure wash. This should remove most of the traffic paint. If not, repeat the procedure.

Road Paint Remover (wipes) – TOTL; Lay the smooth side of the wipe over the contamination to saturate the surface. Let it sit for about one minute to soften the paint. Use the textured side of a new wipe and rub vigorously. Use firm pressure and a lot of action. Particularly difficult cases may take a second application.
 Once you have removed the road paint, wash off the chemical with shampoo and a spot polish should bring back the original shine. (Do not use on paint that is less than 90 days old) The same technique can be used for old tar removal.

Car Brite Road Paint Remover -safely removes road paint, paint overspray, tree sap, tar, bug residue, urethanes, adhesives and rubberized undercoating from cured clear coat finishes.

Thursday 8 February 2018

Selecting a suitable polish, things to consider:


Menzerna Polishing Range

The basis of a scratch begins with depth. The depth of a scratch will determine whether it can be simply buffed out, wet sanded or has to be repainted. If you were to examine a scratch as part of a cross-section, you would notice the surface’s different layers: most commonly metal, primer, colour, and clear coat. To remove a scratch requires that it is polished to the base of the scratch. There are many different types of scratches and identifying their differences is the first step to the selection of the pad/polish required for its removal

What polish should I use?
Where do you start with this question and as much as I dislike answering a question with a question; a little more information is required in order to give an even half-way correct answer. Answering this question with ‘use a compound, a rotary action machine and a wool pad, is like the proverbial ‘use an acid on it’, which is probably overkill. The most obvious one is ‘what did the test panel show you’?

The factors that will affect the polish/compound selected
New or Aged Paint
Paint density (hard or soft paint)
Conversely paint colour or vehicle make has no effect on the polish selected (a scratch is a scratch, regardless of the paint colour

It takes many years of experience to be able to judge with any accuracy the abrasive / pad type/ machine action without utilizing the ‘Test panel method’ that will remove the scratches. One of the things I was taught many years ago was to always use the least aggressive/invasive product first.

Select a ‘typical’ area - (one that represents the type of defects that you want to remove) and starting with the least abrasive polish and / pad combination and then proceed until the defects are removed. This is the polish/pad combination you’ll need to use

Abrasive Polishes

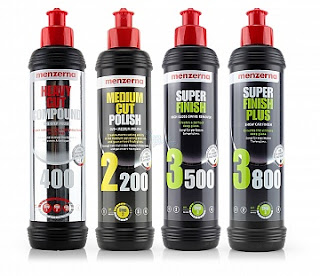
Menzerna Heavy Cut Compound
A light cutting compound designed to remove major paint defects
Capable of polishing out 1200grit sanding marks 
Cut: 10/10
Gloss: 7/10
Contains fillers
Lake Country Hydro-Tech Cutting Pad

Menzerna Medium Cut Polish 2 -200
A light cutting compound designed to remove minor paint defects
Cut: 8/10
Gloss: 8/10
Contains no fillers
Lake Country Hydro-Tech Cutting Pad

Menzerna Medium Cut Polish 2 -500
A light cutting compound designed to remove minor paint defects
Cut: 5/10
Gloss: 9/10
Contains no fillers
Lake Country Hydro-Tech Cutting Pad

Menzerna Super Finish 3500
Cut: 4/10
Gloss: 10/10
Contains no fillers
Lake Country Hydro-Tech Finishing Pad.

Menzerna Super Finish 3800
Its cut and gloss characteristics make it ideal for removing wash /wiping dry marring and faint swirl marks on all paint types
Cut: 2/10
Gloss: 10/10
Contains no fillers
Lake Country Hydro-Tech Finishing Pad.

Menzerna One Step Polish 3-in-1
A heavy cutting compound designed to remove medium paint defects
Capable of polishing out 3000 grit sanding marks 
Cut: 5/10
Gloss: 9/10
Lake Country Hydro-Tech Polishing or Cutting Pad

What about Matte Finish pait?
 You cannot polish to remove scratches in matte paint, Polishing matte paint would smooth imperfections in the clear coat that make matte paint non-reflective, and begin to gradually increase the paint's gloss. This irreversible damage to the factory matte finish, caused by polishing, can only be fixed by repainting the panel.

Selecting a suitable polish / Foam Pad
Using Menzerna polishes / Lake County Hydro-Tech foam pads as a baseline; things to consider: type of defect to remove, Cut, Gloss and a suitable pad. Any abrasive polish and pad combination is only as fine as its coarsest component. All abrasive polishes are ‘foam pad and applied pressure dependant’ as far as their paint correction abilities are concerned. Any abrasive / pad combination is reliant upon its most abrasive component.

Lake Country' s Hydrotech Foam Pads are designed specifically for the application of water-based polishes and compounds.These are low profile pad prolong the working time of water-based polishes and compounds. The slim flat profile makes these pads ideal for buffing hard, scratch-resistant paint finishes.

The key to the polishing process is to know how the paint will react with each pad/polish combination you consider using. You must know your product and what its capabilities are before using it. This is why a ‘test’ spot is so important.

The factors that affect the outcome -speed, friction (kinetic energy) applied pressure, foam pad actual surface contact area, pad grit number (abrasive ability) amount of surface lubrication available, the surface area and heat conductivity of material

The abrasive polishing process is one in which larger surface scratches are replaced with finer and finer scratches until they are invisible to the naked eye.Scratches usually have ridges on two sides, this is what catches the light and makes them visible, Removing these ridges makes the paint surface flat and enables light to be uniformly reflected

The key to the polishing process is to know how the paint will react with each pad/polish combination you consider using. You must know your product and what its capabilities are before using it. This is why a ‘test’ spot is so important.

Going through the grits
This is not a southern states detailer having breakfast. Most polishes have a grit number, that’s to say the grit marks left by wet sanding that can be removed by that polish, So a polished rated at 1500 will remove the micro scratches left by 1500 grit finishing paper. So you gradually go through various polishes (1500, 2500, 3500 and etc) until you have the paint surface gloss you desire, These are called polishing ‘Stages’

Diagnosis is the key; not guesswork
Examine the vehicle's bodywork, a ‘bag-test will ascertain the need for detailer’s clay, and a Brinkman light will help you find any evidence of surface blemishes i.e. swirl marks and scratches.

The most important first step in the process of paint surface detailing is diagnosing the paint surface; density of clear coat (hard or soft) or single stage paint, surface condition; ascertain the severity of the surface blemishes with an inspection light and the paint thickness available.

The paintwork should be evaluated with a paint thickness gauge to see what thickness of clear coat remains before you decide how much paint renovation can be safely carried or wither paint preservation would be the appropriate option, before you proceed, measuring with a paint thickness gauge will dictate the choice and abrasiveness of polish / compound for correction or renovation level required or indeed possible

Always follow the rule of starting with the least abrasive combination, i.e. a machine polish and the least aggressive foam or wool pad (working smarter not harder) The most important first step in the process of paint surface detailing is diagnosing the paint surface; density of clear coat (hard or soft) or single stage paint, surface condition; ascertain the severity of the surface blemishes with an inspection light and the paint thickness available.

Measuring with a paint thickness gauge will dictate the choice and abrasiveness of polish/compound for correction or renovation level required or indeed possible. Assess the correction level working through the range of polishes from the lightest abrasive upwards until the desired level of correction is reached. Selecting the correct pad/polish combination for the vehicles paint/defects can take just as long as the paint correction process

Pad Dependency
Any abrasive polish and pad combination is only as fine as its coarsest component. All abrasive polishes are ‘foam pad and applied pressure dependant’ as far as their paint correction abilities are concerned. Any abrasive / pad combination is reliant upon its most abrasive component.

Lake Country' s Hydrotech Foam Pads are designed specifically for the application of water-based polishes and compounds.These are low profile pads are made from European pre-polymer foam that prolongs the working time of water-based polishes and compounds so you have more time to create a better finish. The slim flat profile makes these pads ideal for buffing hard, scratch-resistant paint finishes.

 If we consider the Lake Country Mfg (LC) White foam (50 PPI) polishing pad as the baseline; any polish used will derive help from the abrasive abilities of the foam. Then consider the LC Blue (70 PPI) finishing pad has no abrasive ability and will contribute nothing to the cutting capability of a polish.

What is derived from this is that a polishes abrasive ability can be ‘fine-tuned’ by using different combinations (abrasiveness) of polish and foam (the same thing is true of wool pads) and of course differing the amount of downward pressure (10-15 Lbs is the usual range) applied will also have an effect on the abrasives capability

Different pad / product combinations (least abrasive pad / polish first)

Base pad/product (least abrasive pad/product) if this combination does not provide the desired results, increase the aggressiveness of the technique or product selection.
Step-up 1 - using the same pad with a more abrasive product
Step-up II – use a less abrasive pad and the same product as used in step-up I
Step-up III- using the same pad with a more abrasive product

As can be ascertained from the above the total abrasive ability of a polish/foam pad combination is subject to many variables, the polishes abrasive ability is just the starting point.

If you need to be more aggressive, step up from a foam pad to a Foam / Wool hybrid and then Wool then Microfiber, if that doesn't work, go to a SurBuf pad and after that, you’ll need to switch your polish or compounds.

Lake County Hydro-Tech foam
Are made of imported European pre-polymer foam. This long-wearing, high-quality foam is less absorbent in order to keep the majority of polish on the pad's surface. This enables a longer working time with your water-based polishes and compounds, resulting in less product used to achieve the perfect finish.

Hydro-Tech Foam Pads are designed specifically for the application of water-based polishes and compounds. European pre-polymer foam prolongs the working time so you have more time to create a flawless finish

Test Panel
When removing defects from the paint surface, consider not only which polish/compound you'll be using, but how you'll be using it. Your choice of machine speed, pad construction, pad size and applied pressure will all impact the abrasive abilities of the polishing liquid.

After testing a section to confirm this method, select an area of 18 x 18-inches and tape it off with painter’s tape, as this is an optimal working section to perform a product test spot; this will help establish a process that will produce the best possible finish, once this is established repeat the process over the entire paint surface.

Select a ‘typical’ area - (one that represents the type of defects that you want to remove) and starting with the least abrasive polish and / pad combination and then proceed until the defects are removed. This is the polish/pad combination you’ll need to use

Pad conditioning
Spread the polish/compound over the pad evenly and ensure it is absorbed into the foam, then spread that polish onto the pad by hand until it becomes 80% saturated.

By ensuring the pad doesn’t become saturated with polish it allows the inbuilt cushioning effect and the pads designed foam qualities; i.e. density (or rebound), compression (‘hardness or stiffness) and without altering its in-built air-flow, which will decrease its heat dissipating abilities, causing it to transfer more kinetic friction heat to the surface

Polishing process
Place four pea-sized dots of the polish selected and proceed to polish out paint defects. When you are satisfied with the results, clean the surface with OPT Paint Prep so that no silicone oils, surfactants, and etc remain.


Cleaning Pads 
All pads have a performance cycle, meaning you will get the desired results only to a certain point on that curve. The point of declining performance is typically reached by polish/compound pad being overloaded with a product; you should always be able to see the individual cells or texture of the pad, with proper, regular cleaning pad overload can be avoided.

Clean and/or replace pads as often as is necessary; a clean, primed and seasoned pad will enhance the abrasive abilities of the compound/polish and make the process not only more efficient but less time-consuming. I would recommend soaking used pads in a  solution of Optimum Power Clean™ / water until you are ready to wash them


Hydro-Tech Foam Pads


Copyright © 2010 - 2016 TOGWT® (Established 1980) all rights reserved